Monday, December 16, 2013

Re-Purposed Pillow from "Grandma"

Most of my followers know that my mom entered eternity on November 27, 2013.  My mom loved to make stuff too.  She has bags of old wool quilts for rug making, bags of yarn for crocheting and granny squares waiting to be put together into quilts.  She wasn't able to finish most of these things, so I took some of her items with hopes of making some great memory gifts.  My great-niece turned 16 this past week and I made her this birthday gift - a pillow.  Here is how I made it.  


I washed the wool blanket and cut it into 2 squares.  I sewed them together, turned it inside out and stuffed it with a pillow form.


Then I sewed it closed.


My mom already had these granny squares crocheted into squares, so I put it on top of the pillow, pinned it to secure and whip stitched it on with yarn.  


She loved it.  Now my girls each want too.  

Blessings from Ringle, Wisconsin.

Merry Craftmas!

Linked to:  http://littlehomesteadonthehill.blogspot.com/2013/12/the-creative-home-garden-hop.html?utm_source=feedburner&utm_medium=email&utm_campaign=Feed:


Motivation Monday - Create Memories not Masterpieces

In this post, I want to motivate you not to be so motivated.  I know, right?  Well, I just want to remind us that we don't have to "do it all."

This time of year, especially, I think we can be hard on ourselves.  I have to get out the cards, I have to bake, I have to go shopping, I have to get this person a present, that person one, I have to set up the tree, the outside decorations....on and on.  STOP.

If creating the "perfect Christmas" is what makes you happy, well, by all means go ahead.  If trying to create the "perfect Christmas" is pushing you over the edge and you are becoming crabby with your family - then stop it.  We have to examine the reasons why we are doing it.   Are we creating good memories or masterpieces?

Years ago, when I did shows almost every weekend from September to the first weekend in December, I would get tired of the holiday seasons.  Once you set up a booth that many times....you don't feel like decorating at home.  It was one of those years that I learned a valuable lesson.  

I was tired of setting up trees, decorating and creating.  I had already done that since September.   My girls were smaller, I knew I had to get a tree, it is Christmas after all.  I really "couldn't stand" to go downstairs and dig for all the lights, ornaments and such.  So, I didn't.  I found a couple of strings of blue lights in one of my "buy out" boxes that was on the top of my hoarded mess out in my shop.  So, I put those on the tree.  In the same box were some blue silk ornaments, so I brought those in too.  I still had my crafting stash in the house, so I told the girls that we would have a homemade Christmas.  I let them come up with the idea and away they went.  They made the cutest silver snowflakes with sequins.  The whole tree was blue and silver.  It was actually really pretty.   It kept them busy for hours, we shared time in making them.  They decorated the whole tree themselves.

Was it a masterpiece?  No.  Did we create memories?  Yes.  My greatest masterpieces are my girls.  No "perfect Christmas" could ever be more important than them.  

Blessings from Ringle, Wisconsin.

Linked to:  http://timewarpwife.com/?p=1330


http://www.raisingmightyarrows.net/2013/12/proverbs-31-thursdays-link-4.html?utm_source=feedburner&utm_medium=feed&utm_campaign=Feed:

Wednesday, December 11, 2013

Memory Ornament and Candle Holder

I have been going through some therapy - crafting therapy.  I have been busy making some decorations and gifts.  I came up with these 2 items.  


To make something similar, all you need to do is photo copy your picture on tissue paper.  This turned out to be tricky, but I figured out an easy way.  I know that paper products for this purpose are out there but, this is cheap and easy.

Step 1:  you will need your photo, a piece of tissue paper, a piece of copy paper, tape and a copier.


Step 2:  fold the tissue paper over the end of the copy paper and tape.  Flip it over and tape down the tissue on the front side as well.  This will help the tissue not to get stuck in the copier.  Copy.


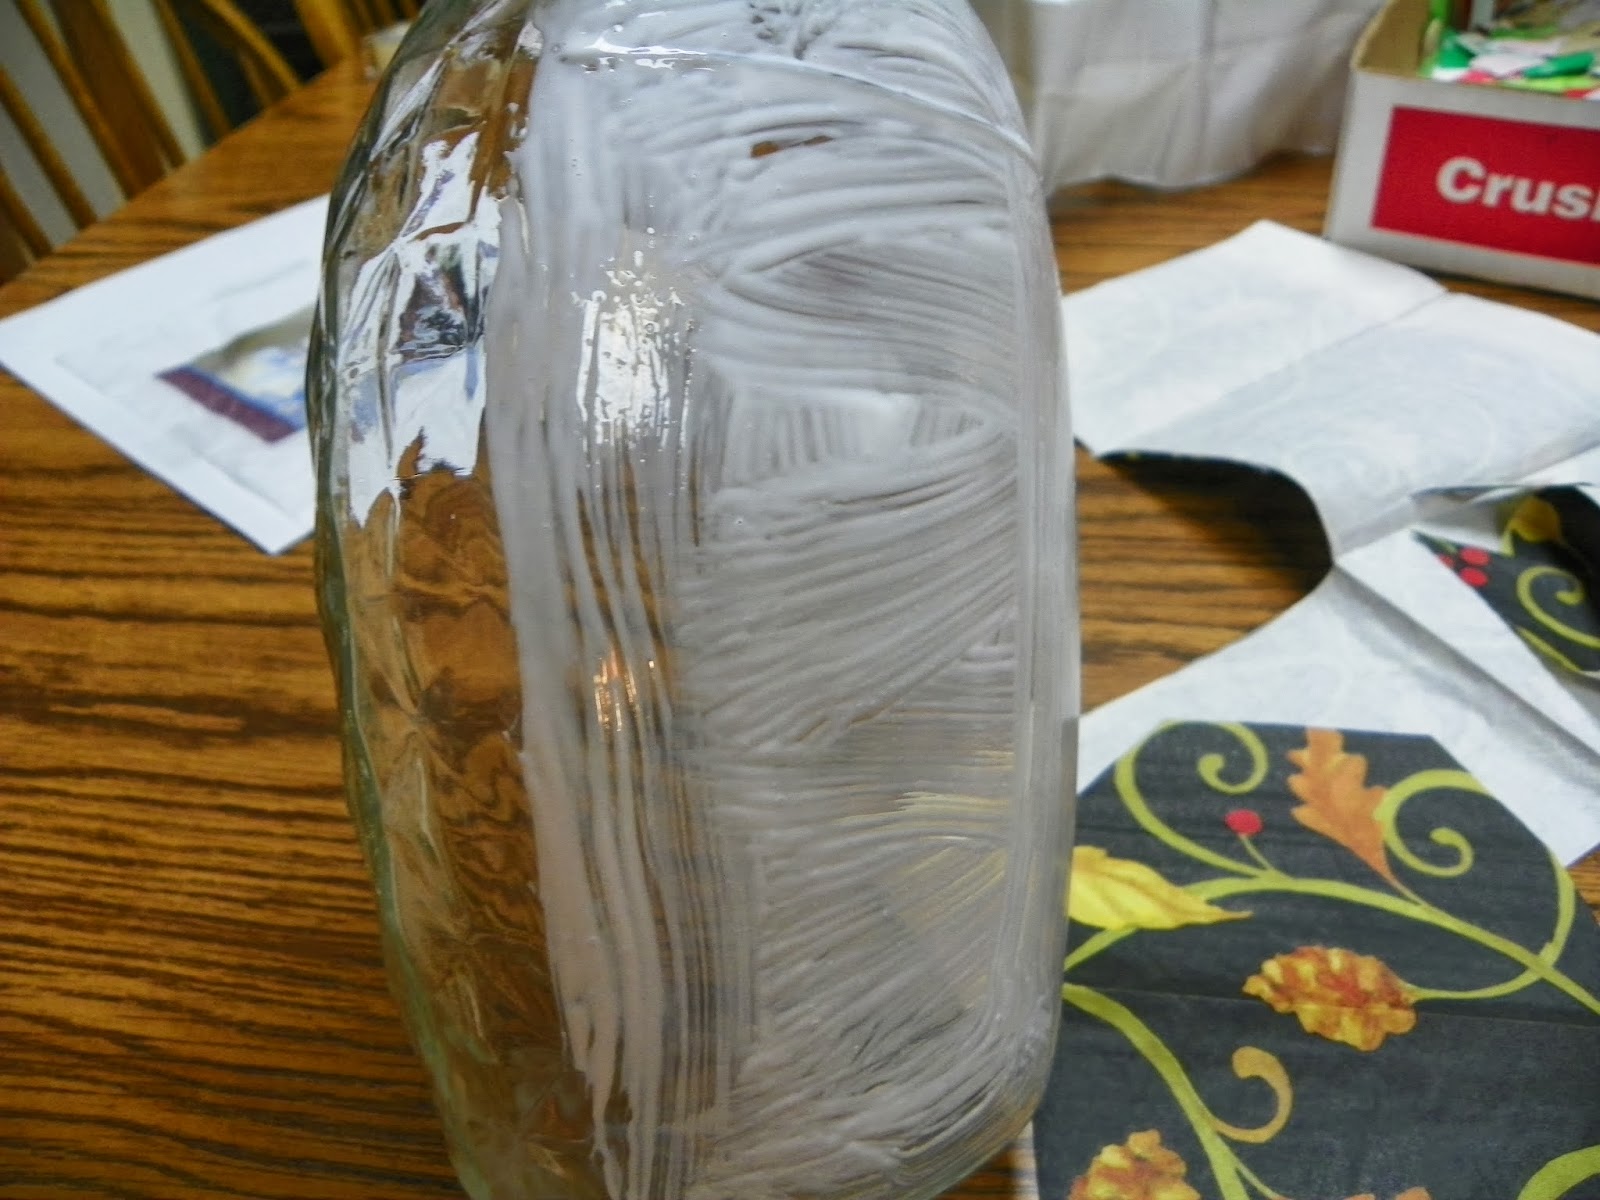
Step 3:  take your tissue copied image and remove from the copy paper.  Find an object you want to decoupage on; I used an old honey jar.  Find a complimentary paper to go with your item.  You could use pages from an old book, sheet music, tissue paper or I used a paper napkin.  Because my jar had detailed sides, I chose to only cover the back.


Step 4:  brush on the Mod Podge and lay down the image and paper.  Smooth it out with your fingers.


A tip I learned from one of my youngest 4-Hrs....is lay down all the paper first then cover the whole item with the Mod Podge.  I was covering this as I went - it was messy - I noticed Brooke was doing it this way...wow, she is pretty smart!

Step 5:  cover the whole item with Mod Podge and let dry.


I used these same steps to make an ornament.


It helps to hang these to dry - I used a hanger and paper clip.

That is it.  Super easy.  

Blessings from Ringle, Wisconsin.

Merry Craftmas!


http://www.tillysnest.com/2013/12/down-home-blog-hop-number-67-two-family.html?utm_source=feedburner&utm_medium=feed&utm_campaign=Feed%3A+TillysNest+%28Tilly%27s+Nest%29

http://www.create-with-joy.com/2013/12/inspire-me-monday-week-101.html?subscribe=success#subscribe-blog

God's Word Wednesday

I ran into Dime & Dollar thrift store the other day.   They had all Christmas stock 50% off.  I found a few things, including this book; it was only 0.02.  


I thought, these are all short stories - I could use a little Christmas Spirit - so, I bought it.  Little did I know how much I would like the first story.  "The Story of the Other Wise Man", by:  Henry Van Dyke.  I never heard of this story.  I truly enjoyed it.  I feel that I was meant to find it.  

This story is about another wise man, who sold all that he had for 3 treasures:  a sapphire, ruby and pearl to give to the King.  His plan was to meet up with 3 other wise men in search of the King.  On his journey he faced 3 challenges that lead him to give up these 3 treasures to save another.  I don't want to give it away for those who may not have read it.  Trust me, it is a good story with a great message.  

What I took from this, why I felt it was meant for me, has a lot to do with the passing of my mom.  She was in need of our care for 11 years.  I feel bad about it, but during those years, at times I was mad at my brother (the missionary).  In my mind....he was in an island paradise while I was stuck here making tough decisions about our mom's care.  I know, I'm terrible, but honestly, this is how I felt.  Brace yourself for more honesty....I even might have said "sure, he is down there doing God's work, adding more jewels to his heavenly crown...and I am stuck here..."  I know I'm terrible.

The message behind this story is that even though this other wise man used his treasures to help others, spent years searching for the King, using his talents along the way to do things for others....his message was....that in doing this, he found the King.  Matthew 25: 40 "...verily I say unto thee, Inasmuch as thou hast done it unto the least of these my brethren, thou hast done it unto me."

So, I'm thankful I found this little book, read this short story and found a message for me.   My brother is doing this as well.  Had he not left his life here to do God's work there, these "least of these" might not have heard about Jesus.  I guess, I too was doing this here.  I believe that someone bound to a wheelchair needing daily cares would be a "least of these."

So, I am renewed today in God's word, as this story revealed to me, not only my attitude toward my brother, but the blessing that comes from helping others.  Forgive me as I grow and change.

Blessings from Ringle, Wisconsin.

Linked to:
http://www.raisingmightyarrows.net/2013/12/proverbs-31-thursdays-link-3.html?utm_source=feedburner&utm_medium=feed&utm_campaign=Feed:

Tuesday, December 10, 2013

Repurposed Christmas Wreath


On one of my recent thrift shopping excursions, I came across this set of vintage plastic holly string of lights.  They were in a bag for only $1.49 so I decided to take a chance with it.  They are not perfect as some of the lights are not working so I decided to make a wreath with them.  That way, when they were wound together you wouldn't notice that a few didn't work.


I took an old wire hanger and made a wreath form.  I wound the lights around so that the plug in was at the bottom.


I then took some of the frosted pine cones I made (see link on how to here:  http://dickybirdsnest.blogspot.com/2013/12/frosted-pinecones.html  ) and wired them on the wreath.


It was missing something...so I decided to make a felt holly ornament to add.  The link on how to make this is here:  http://dickybirdsnest.blogspot.com/2013/12/felt-holly-ornament.html


I liked how it turned out.  Total cost less than $2.  I love to repurpose old things and add new life to them.  Now I will have a "treasure" till the rest of the lights burn out.. :).

Blessings from Ringle, Wisconsin.

Merry Craftmas!

http://timewarpwife.com/?p=1244

Felt Holly Ornament


Felt Holly Ornament

I made this because I needed something for a wreath I was making - that will be the next post.  First I make a holly leaf pattern and traced it on the felt.


I cut them out with pinking shears.  I wanted the leaf to be bendable so I decided to layer a piece of wire between the 2 pieces of felt.


Start by putting the knotted end of the embroidery floss in the inside of the leaf.  Stitch down the piece of wire to secure it.  Then put the other piece on top and do simple cross stitch around the piece of wire.  


I wanted to add a pom pom for the berry.  When I was little we made these with bells in the middle for our ice skates.  I made a form to wind the yarn around.  Just take a piece of cardboard and cut out the middle on both sides.  


Just wrap your yarn around the cardboard.  The more times you go around, the "fatter" the pom pom.  I did 100 wraps around the cardboard.  


Cut another piece of yard like 5" or so and tie it around the bundle in the middle where the cut out parts are.  I pulled the cardboard apart in the middle and pulled the tying yard even tighter. Cut the looped ends.


I tied another piece of yarn to make the pom pom even tighter.  Fluff it up.  


Twist the 2 holly leaves together.  I attached the pom pom to the leaves by sewing a jingle bell in the middle.  

I always look for craft supplies at thrift shops.  This pack of jingle bells were in a bag of supplies for less than $2.  I have found some real vintage treasures this way.


I added mine to a wreath, however, these would make cute ornaments, make several and make a garland or use on the top of your Christmas gift - a gift (ornament) as well as a decoration.

Blessings from Ringle, Wisconsin.

Merry Craftmas!